Spring基础教程(三)
注解方式编写第一个Spring小例子
上节我们使用XML编写了第一个spring小例子,其中,applicationContext.xml常用于加载spring系统级别的组件,比如bean的初始化。可以简单理解为是Spring IOC容器的配置文件。
除了XML配置方式,目前更多的采用注解(annotation)方式实现IOC配置。
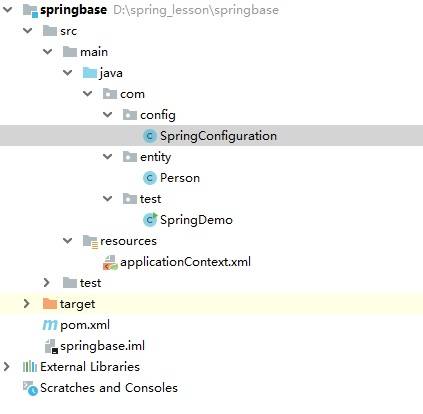
项目目录结构图如下:
实现步骤:
1.使用idea新建一个maven模块。
在pom.xml中导入以下依赖。
<?xml version="1.0" encoding="UTF-8"?>
<project xmlns="http://maven.apache.org/POM/4.0.0"
         xmlns:xsi="http://www.w3.org/2001/XMLSchema-instance"
         xsi:schemaLocation="http://maven.apache.org/POM/4.0.0 http://maven.apache.org/xsd/maven-4.0.0.xsd">
    <modelVersion>4.0.0</modelVersion>

    <groupId>com.simoniu</groupId>
    <artifactId>springbase</artifactId>
    <version>1.0-SNAPSHOT</version>

    <properties>
        <spring.version>5.2.5.RELEASE</spring.version>
    </properties>

    <dependencies>
        <!-- https://mvnrepository.com/artifact/org.springframework/spring-core -->
        <dependency>
            <groupId>org.springframework</groupId>
            <artifactId>spring-core</artifactId>
            <version>${spring.version}</version>
        </dependency>

        <!-- https://mvnrepository.com/artifact/org.springframework/spring-context -->
        <dependency>
            <groupId>org.springframework</groupId>
            <artifactId>spring-context</artifactId>
            <version>${spring.version}</version>
        </dependency>

        <!-- https://mvnrepository.com/artifact/org.springframework/spring-beans -->
        <dependency>
            <groupId>org.springframework</groupId>
            <artifactId>spring-beans</artifactId>
            <version>${spring.version}</version>
        </dependency>

        <!-- https://mvnrepository.com/artifact/org.springframework/spring-web -->
        <dependency>
            <groupId>org.springframework</groupId>
            <artifactId>spring-web</artifactId>
            <version>${spring.version}</version>
        </dependency>

    </dependencies>

</project>
2.编写Person实体类。 在com.entity包下创建Person实体类,如下:
package com.entity;

public class Person {

    private String name;
    private String gender;
    private int age;

    public Person() {
    }

    public Person(String name, String gender, int age) {
        this.name = name;
        this.gender = gender;
        this.age = age;
    }

    public String getName() {
        return name;
    }

    public void setName(String name) {
        this.name = name;
    }

    public String getGender() {
        return gender;
    }

    public void setGender(String gender) {
        this.gender = gender;
    }

    public int getAge() {
        return age;
    }

    public void setAge(int age) {
        this.age = age;
    }

    @Override
    public String toString() {
        return "Person{" +
                "name='" + name + '\'' +
                ", gender='" + gender + '\'' +
                ", age=" + age +
                '}';
    }
}
3.创建Spring配置类 在resources资源目录下,创建applicationContext.xml.开启注解模式。
<?xml version="1.0" encoding="UTF-8"?>
<beans xmlns="http://www.springframework.org/schema/beans"
       xmlns:xsi="http://www.w3.org/2001/XMLSchema-instance"
       xmlns:context="http://www.springframework.org/schema/context"
       xsi:schemaLocation="http://www.springframework.org/schema/beans http://www.springframework.org/schema/beans/spring-beans.xsd http://www.springframework.org/schema/context https://www.springframework.org/schema/context/spring-context.xsd">


    <!--开启注解功能-->
    <!-- 注解扫描 -->
    <context:component-scan base-package="com"/>

</beans>
4.编写IOC配置类 在com.config包下创建SpringConfiguration类,添加有@Configuration注解的类,其作用就等同于applicationContext.xml, 代码如下:
package com.config;

import com.entity.Person;
import org.springframework.context.annotation.Bean;
import org.springframework.context.annotation.Configuration;

@Configuration
public class SpringConfiguration {

    @Bean("p1")
    public Person getPerson(){
        return new Person("zhangsan","男",20);
    }
}
5.编写测试类
在com.test包下创建SpringDemo类。代码如下:
package com.test;

import com.entity.Person;
import org.springframework.context.ApplicationContext;
import org.springframework.context.support.ClassPathXmlApplicationContext;

public class SpringDemo {

    public static void main(String[] args) {

        ApplicationContext context = new ClassPathXmlApplicationContext("applicationContext.xml");
        Person person = (Person) context.getBean("p1");
        System.out.println(person);
    }

}
6.测试运行

如何使用全注解方式?
我们发现虽然我们使用了注解方式,但是开启注解的语句还是配置在了applicationContext.xml中。如何在配置类中开启注解模式呢?
我们改写SpringConfiguration ,添加 @ComponentScan注解,如下:
package com.config;

import com.entity.Person;
import org.springframework.context.annotation.Bean;
import org.springframework.context.annotation.ComponentScan;
import org.springframework.context.annotation.Configuration;

@Configuration
@ComponentScan(basePackages=("com"))
public class SpringConfiguration {

    @Bean("p1")
    public Person getPerson(){
        return new Person("zhangsan","男",20);
    }
}
改写SpringDemo 测试类,如下:
package com.test;

import com.config.SpringConfiguration;
import com.entity.Person;
import org.springframework.context.ApplicationContext;
import org.springframework.context.annotation.AnnotationConfigApplicationContext;
import org.springframework.context.support.ClassPathXmlApplicationContext;

public class SpringDemo {

    public static void main(String[] args) {

        AnnotationConfigApplicationContext context = new AnnotationConfigApplicationContext(SpringConfiguration.class);
        Person person = (Person) context.getBean("p1");
        System.out.println(person);
    }

}
这样就完全不依赖applicationContext.xml来开启注解模式啦!运行结果完全相同。