Vue基础教程(十二)
讲解Vue的路由
Vue.js 路由允许我们通过不同的 URL 访问不同的内容。 通过 Vue.js 可以实现多视图的单页Web应用(single page web application,SPA)。
Vue.js 路由需要载入 vue-router 库实现路由。
例如:
<!DOCTYPE html>
<html lang="zh">
<head>
    <meta charset="UTF-8">
    <meta name="viewport" content="width=device-width, initial-scale=1.0">
    <meta http-equiv="X-UA-Compatible" content="ie=edge">
    <title>Document Title</title>
</head>

<body>
<div id="app">
    <h1>Hello Vue!</h1>
    <p>
        <!-- 使用 router-link 组件来导航. -->
        <!-- 通过传入 `to` 属性指定链接. -->
        <!-- <router-link> 默认会被渲染成一个 `<a>` 标签 -->
        <router-link to="/">首页</router-link>
        <router-link to="/users">用户管理</router-link>
        <router-link to="/items">商品管理</router-link>
    </p>
    <!-- 路由出口 -->
    <!-- 路由匹配到的组件将渲染在这里 -->
    <router-view></router-view>
</div>

<!---注意:这个次序很关键,一定先引入vue再引入vue-router-->
<script src="https://cdn.bootcdn.net/ajax/libs/vue/2.6.13/vue.min.js"></script>
<!--单独引入vue-router核心依赖-->
<!--必须引入vue-router 3.x版本,因为vue-router4.x和vue2版本不兼容。-->
<script src="https://cdn.bootcdn.net/ajax/libs/vue-router/3.5.2/vue-router.min.js"></script>

<script>
    // 1. 定义(路由)组件。
    // 可以从其他文件 import 进来
    const Welcome = {template: '<div>欢迎首页</div>'}
    const Users = {template: '<div>用户管理页面</div>'}
    const Items = {template: '<div>商品管理页面</div>'}
    // 2. 定义路由
    // 每个路由应该映射一个组件。
    const routes = [
        {path: '/', redirect: '/welcome'}, //设置默认指向的路径
        {path: '/welcome', component: Welcome},
        {path: '/users', component: Users},
        {path: '/items', component: Items}
    ]

    // 3. 创建 router 实例,然后传 `routes` 配置
    const router = new VueRouter({
        routes // (缩写)相当于 routes: routes
    })
    let vm = new Vue({
        el: '#app',
        router,
        data: {}
    })
</script>
</body>
</html>
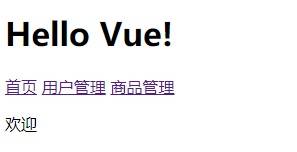
运行效果:
路由组件也可以从其它文件 import 进来。 在route/template目录下,创建一个template.js组件
export const Welcome = {template: '<div>欢迎首页</div>'}
export const Users = {template: '<div>用户管理页面</div>'}
export const Items = {template: '<div>商品管理页面</div>'}
在route目录下,创建router.js
import {Welcome,Users,Items} from './template/template.js'; //注意使用.js扩展名,否则不能正常加载template组件。
// 1. 定义路由
// 每个路由应该映射一个组件。
const routes = [
    {path: '/', redirect: '/welcome'}, //设置默认指向的路径
    {path: '/welcome', component: Welcome},
    {path: '/users', component: Users},
    {path: '/items', component: Items}
]

// 2. 创建 router 实例,然后传 `routes` 配置
export const router = new VueRouter({
    mode: 'history',
    routes // (缩写)相当于 routes: routes
})
修改html页面内容如下:
<!DOCTYPE html>
<html lang="zh">
<head>
    <meta charset="UTF-8">
    <meta name="viewport" content="width=device-width, initial-scale=1.0">
    <meta http-equiv="X-UA-Compatible" content="ie=edge">
    <title>Document Title</title>
</head>

<body>
<div id="app">
    <h1>Hello Vue!</h1>
    <p>
        <!-- 使用 router-link 组件来导航. -->
        <!-- 通过传入 `to` 属性指定链接. -->
        <!-- <router-link> 默认会被渲染成一个 `<a>` 标签 -->
        <router-link to="/">首页</router-link>
        <router-link to="/users">用户管理</router-link>
        <router-link to="/items">商品管理</router-link>
    </p>
    <!-- 路由出口 -->
    <!-- 路由匹配到的组件将渲染在这里 -->
    <router-view></router-view>
</div>

<script src="https://cdn.bootcdn.net/ajax/libs/vue/2.6.13/vue.min.js"></script>
<!--必须引入vue-router 3.x版本,因为vue-router4.x和vue2版本不兼容。-->
<script src="https://cdn.bootcdn.net/ajax/libs/vue-router/3.5.2/vue-router.min.js"></script>

<script type="module">
    import {router} from './route/router.js'
    let vm = new Vue({
        el: '#app',
        router,
        data: {}
    })
</script>
</body>
</html>
运行效果完全相同。