Vue基础教程(十)
Vue综合实例一
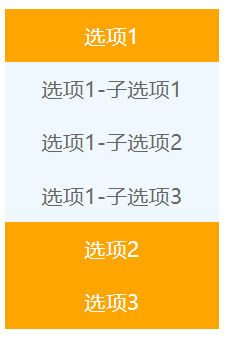
使用vue的指令实现一个菜单效果。
<!DOCTYPE html>
<html lang="zh">
<head>
    <meta charset="UTF-8">
    <meta name="viewport" content="width=device-width, initial-scale=1.0">
    <meta http-equiv="X-UA-Compatible" content="ie=edge">
    <title>Document Title</title>
</head>

<body>
    <div id="app">
      <div class="menu" v-for="(item,index) in menuList" :key="index">
          <div class="menu_title" @click="changeMenu(index)">{{item.title}}</div>
          <div class="menu_sub" v-show="item.isShow" v-for="(subItem,index2) in item.list" :key="index2" @click="showMenuInfo(index,index2)">
              {{subItem}}
          </div>
      </div>
    </div>
    <script src="https://cdn.bootcdn.net/ajax/libs/vue/2.6.13/vue.min.js"></script>
    <script>
        new Vue({
            el: '#app',
            data: {
                menuList: [
                    {
                        title: '选项1',
                        list: [
                            '选项1-子选项1',
                            '选项1-子选项2',
                            '选项1-子选项3'
                        ],
                        //控制当前的子菜单是否显示
                        isShow: false

                    },
                    {
                        title: '选项2',
                        list: [
                            '选项2-子选项1',
                            '选项2-子选项2',
                            '选项2-子选项3'
                        ],
                        isShow: false
                    },
                    {
                        title: '选项3',
                        list: [
                            '选项3-子选项1',
                            '选项3-子选项2',
                            '选项3-子选项3'
                        ],
                        isShow: false
                    }
                ]
            },
            methods:{
                changeMenu(index){

                    //1.首先让所有的子菜单先隐藏
                    for(let i=0;i<this.menuList.length;i++){
                        if(i!=index) {
                            this.menuList[i].isShow = false;
                        }
                    }

                    //2.你点那个把那个子菜单状态取反。
                    this.menuList[index].isShow = !this.menuList[index].isShow
                },
                showMenuInfo(index,index2){
                    console.log(this.menuList[index].list[index2]);
                }
            }
        })
    </script>

    <style>

        #app{
            margin: 0px auto;
            width: 160px;
            height: auto;
        }
        .menu {
            width: 160px;
            height: auto;
            padding: 0px;
            /*background: aliceblue;*/
            cursor: pointer;
        }
        .menu .menu_title {
            width: 100%;
            height: 40px;
            text-align: center;
            line-height: 40px;
            background: orange;
            color: #FFF;
        }
        .menu .menu_sub {
            width: 100%;
            height: 40px;
            text-align: center;
            line-height: 40px;
            background: aliceblue;
            color: #666;
        }
    </style>
</body>
</html>
运行效果:
把菜单部分抽取出来,封装为一个全局组件,方便其它页面复用。
实现步骤
1)实现treememu.js. 组件部分
Vue.component('my-tree-menu', {
    //组件的属性
    data: function () {
        return {
            menuList: [
                {
                    title: '选项1',
                    list: [
                        '选项1-子选项1',
                        '选项1-子选项2',
                        '选项1-子选项3'
                    ],
                    //控制当前的子菜单是否显示
                    isShow: false

                },
                {
                    title: '选项2',
                    list: [
                        '选项2-子选项1',
                        '选项2-子选项2',
                        '选项2-子选项3'
                    ],
                    isShow: false
                },
                {
                    title: '选项3',
                    list: [
                        '选项3-子选项1',
                        '选项3-子选项2',
                        '选项3-子选项3'
                    ],
                    isShow: false
                }
            ]
        }
    },
    //组件的模板部分
    template: '<div><div class="menu" v-for="(item,index) in menuList" :key="index">\n' +
        '          <div class="menu_title" @click="changeMenu(index)">{{item.title}}</div>\n' +
        '          <div class="menu_sub" v-show="item.isShow" v-for="(subItem,index2) in item.list" :key="index2" @click="showMenuInfo(index,index2)">\n' +
        '              {{subItem}}\n' +
        '          </div>\n' +
        '      </div></div>',

    methods: {
        changeMenu(index) {

            //1.首先让所有的子菜单先隐藏
            for (let i = 0; i < this.menuList.length; i++) {
                if (i != index) {
                    this.menuList[i].isShow = false;
                }
            }

            //2.你点那个把那个子菜单状态取反。
            this.menuList[index].isShow = !this.menuList[index].isShow
        },
        showMenuInfo(index, index2) {
            console.log(this.menuList[index].list[index2]);
        }
    }
})
注意:组件的template属性,里面通常是静态页面模板,要求有且只有一个根元素,并且根元素上不能使用v-for指令遍历。所以我们把上例中id=app的div里面的两个DIV外面又套了一层div后,整个内容作为组件的模板内容。
2)测试页面引用组件
<!DOCTYPE html>
<html lang="zh">
<head>
    <meta charset="UTF-8">
    <meta name="viewport" content="width=device-width, initial-scale=1.0">
    <meta http-equiv="X-UA-Compatible" content="ie=edge">
    <title>Document Title</title>
</head>

<body>
<div id="app">
  <my-tree-menu></my-tree-menu>
</div>
<script src="https://cdn.bootcdn.net/ajax/libs/vue/2.6.13/vue.min.js"></script>
<!--引入自定义tree-components-->
<script src="components/treemenu.js"></script>
<script>
    new Vue({
        el: '#app',
        data:{
        }
    })
</script>

<style>

    #app{
        margin: 0px auto;
        width: 160px;
        height: auto;
    }

    .menu {
        width: 160px;
        height: auto;
        padding: 0px;
        /*background: aliceblue;*/
        cursor: pointer;
    }
    .menu .menu_title {

        width: 100%;
        height: 40px;
        text-align: center;
        line-height: 40px;
        background: orange;
        color: #FFF;
    }

    .menu .menu_sub {
        width: 100%;
        height: 40px;
        text-align: center;
        line-height: 40px;
        background: aliceblue;
        color: #666;
    }
</style>
</body>
</html>
运行效果完全相同!