使用gradio库实现调用Yolov8模型实现车牌检测
使用gradio库实现调用Yolov8模型实现车牌检测
1. gradio简介
Gradio 是一个用于构建和分享机器学习模型和数据科学应用的开源Python库。它简化了创建交互式Web界面的过程,让开发者可以快速搭建原型并与他人分享。
Gradio的主要特性:
- 易用性:无需前端开发经验, 只需几行Python代码就可以创建功能完备的Web界面。即时部署:可以快速本地运行和在线共享。
- 广泛的支持:支持多种输入和输出类型:包括图像、文本、音频、视频、滑动条等。与主流机器学习框架兼容:如TensorFlow、PyTorch、scikit-learn等。
- 自动化:自动生成接口:根据定义的函数自动生成Web界面。实时更新:可以实时查看和测试模型的效果。
- 协作和分享:共享链接:生成的应用可以通过链接分享,方便他人访问和测试。集成到现有的工作流程中:可以与Jupyter Notebook、Google Colab等集成使用。
2.Gradio的基本使用方法
安装Gradio:
pip install gradio
创建一个简单的Gradio应用:
import gradio as gr

def greet(name):
    return f"Hello {name}!"

iface = gr.Interface(fn=greet, inputs="text", outputs="text")
iface.launch()
支持多种输入和输出类型:
Gradio支持多种输入和输出组件,如图像、视频、音频、滑动条、复选框等。
- 文本输入:gr.Textbox
- 滑动条:gr.Slider
- 复选框:gr.Checkbox
- 图像:gr.Image
- 音频:gr.Audio
- 视频:gr.Video
多个输入和输出:
支持多输入和多输出的情况,可以构建复杂的界面。
def process_data(name, age, image):
    # 假设处理这些输入并返回结果
    return f"Name: {name}, Age: {age}", image

iface = gr.Interface(
    fn=process_data,
    inputs=[gr.inputs.Textbox(label="Name"), gr.inputs.Slider(0, 100, label="Age"), gr.inputs.Image(type="numpy", label="Image")],
    outputs=["text", "image"]
)
iface.launch()
3.实例
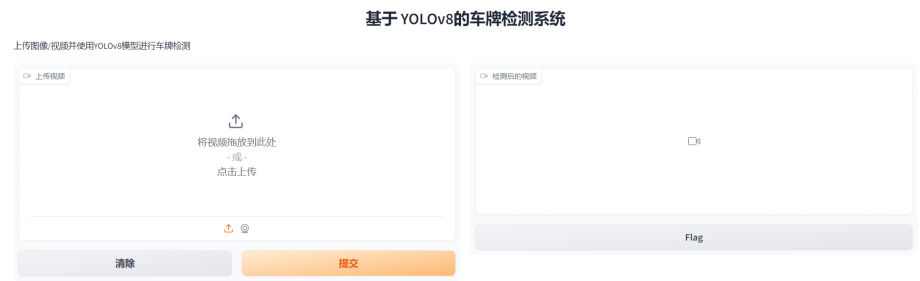
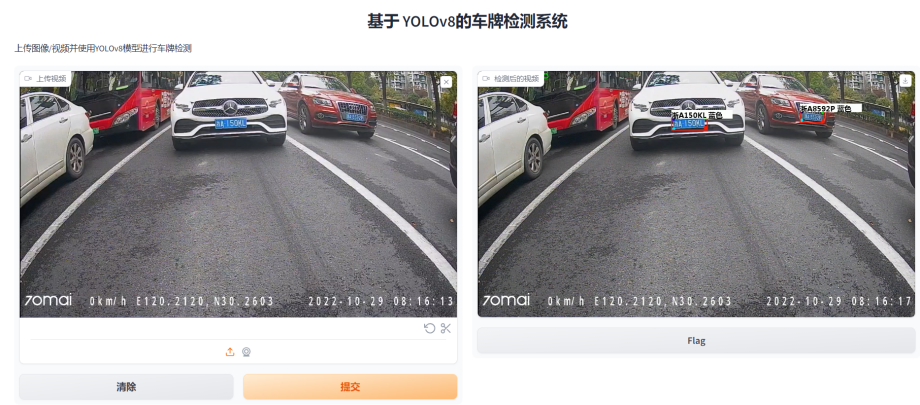
本文主要使用Gradio库创建了一个Web应用,允许用户上传视频,并使用YOLOv8模型对视频进行目标检测。处理后的视频会显示检测框和标签,并展示检测结果的详细信息。通过简单的Web界面,用户可以轻松地进行图像检测而无需编写复杂的前端代码。
实现代码:
import gradio as gr
from ultralytics import YOLO
import os
import subprocess
import uuid
from shutil import copy

#重新定义UPLOAD_PATH和DETECT_PATH
UPLOAD_PATH = os.path.join(os.path.dirname(__file__), 'static/upload')
DETECT_PATH = os.path.join(os.path.dirname(__file__), 'static/result')
os.makedirs(UPLOAD_PATH, exist_ok=True)
os.makedirs(DETECT_PATH, exist_ok=True)


#生成UUID的函数
def generate_uuid():
    return str(uuid.uuid4())

#文件拷贝命令
def file_copy(src,dest):
    copy(src, dest)

def get_video_filename(video_path):
    return os.path.basename(video_path)

#加载模型
model = YOLO('yolov8n.pt')


def process_video(video):
    # 假设处理这些输入并返回结果
    # 先生成一个UUID
    uuid_path = generate_uuid()
    # 使用os.makedirs递归地创建目录
    os.makedirs(UPLOAD_PATH + "/" + uuid_path)
    os.makedirs(DETECT_PATH + "/" + uuid_path)

    # 如果是视频则保存上传的视频
    print(get_video_filename(video))
    video_filename = get_video_filename(video)
    file_copy(video, os.path.join(UPLOAD_PATH + "/" + uuid_path, video_filename))

    # 要执行的yolo命令
    predict_command = [
        'python',
        'detect_plate.py',
        '--detect_model',
        'weights/plate_detect.pt',
        '--rec_model',
        'weights/plate_rec_color.pth',
        '--video',
        'static/upload/' + uuid_path + '/' + video_filename,  # 是不是上传成功的视频文件地址
        '--output',
        'static/result/' + uuid_path
    ]

    try:
        subprocess.run(predict_command, timeout=1200)  # 超时时间是20分钟
        result_video_path = os.path.join('', 'result.mp4')
        dest_video_path = os.path.join('static/result/' + uuid_path, video_filename)
        file_copy(result_video_path, dest_video_path)
        #获取要返回的视频文件路径
        video = 'static/result/' + uuid_path + '/' + video_filename
        #返回视频路径即可
        return video
    except subprocess.CalledProcessError as e:
        return e.stderr

#感觉和前端的form是一回事。
iface = gr.Interface(
    fn=process_video,
    inputs=[gr.Video(label="上传视频")],
    outputs=[gr.Video(label="检测后的视频")],
    title="基于 YOLOv8的车牌检测系统",
    description="上传图像/视频并使用YOLOv8模型进行车牌检测"
)

#定义端口号
gradio_port = 8080
gradio_url = f"http://127.0.0.1:{gradio_port}"
iface.launch(
    server_name="127.0.0.1",
    server_port=gradio_port,
    debug=True,
    auth=("admin", "123456"),
    auth_message="请输入账号信息访问此应用。测试账号:admin,密码:123456",
    inbrowser=False,
    prevent_thread_lock=True,
    share=True
)
运行程序,结果如下所示:

上述代码默认情况下是只能在本地访问的。Gradio应用在默认情况下会在本地启动一个服务器,并提供一个本地URL(通常是 http://127.0.0.1:7860)用于访问, 我们这里把端口设置为:8080。 如果你希望使这个应用可以通过互联网访问,可以在调用 launch 方法时添加参数 share=True。这将使Gradio为你生成一个临时的公网URL,其他人也可以通过这个URL访问你的应用。
4.gradio cv2.imwrite 上传图片颜色改变问题
在使用gradio 的gr.Image组件上传图片后使用cv2.imwrite 方法保存上传图片后,有时会出现上传图片颜色改变问题。这个问题可能是由于图像在上传过程中的压缩或者编码导致的颜色失真。cv2.imwrite 函数在保存图像时使用的是 JPEG 格式,而 JPEG 是有损格式,它在保存图像时会对颜色信息进行压缩,导致颜色失真。
解决方法:
- 使用不压缩的图像格式保存图像,比如 PNG。
- 在使用 cv2.imwrite 之前,将图像转换为其他格式,比如PIL的 Image 对象,然后再使用 cv2.imwrite
import gradio as gr
from PIL import Image
import cv2
import numpy as np

def process_image(image):
    # 将图像从 NumPy 数组转换为 PIL 图像
    image = Image.fromarray(np.uint8(image))
    # 将 PIL 图像转换为 OpenCV 格式
    image = cv2.cvtColor(np.array(image), cv2.COLOR_RGB2BGR)
    # 使用 cv2.imwrite 保存图像,指定 PNG 格式以避免颜色失真
    filename = "output_image.png"
    cv2.imwrite(filename, image)
    return filename