pytorch的hub模块
强大的hub模块
hub 模块是调用别人训练好的网络架构以及训练好的权重参数,使得自己的一行代码就可以解决问题,方便大家进行调用。
1.强大的hub模块
hub 模块是调用别人训练好的网络架构以及训练好的权重参数,使得自己的一行代码就可以解决问题,方便大家进行调用。
- hub 模块的GITHUB 地址是: https://github.com/pytorch/hub
- hub 模块的模型网址是: https://pytorch.org/hub/research-models
2.hub 模块的使用
首先,我们进入网址。会出现如下的界面(这其中就是别人训练好的模型,我们通过一行代码就可以实现调用)。
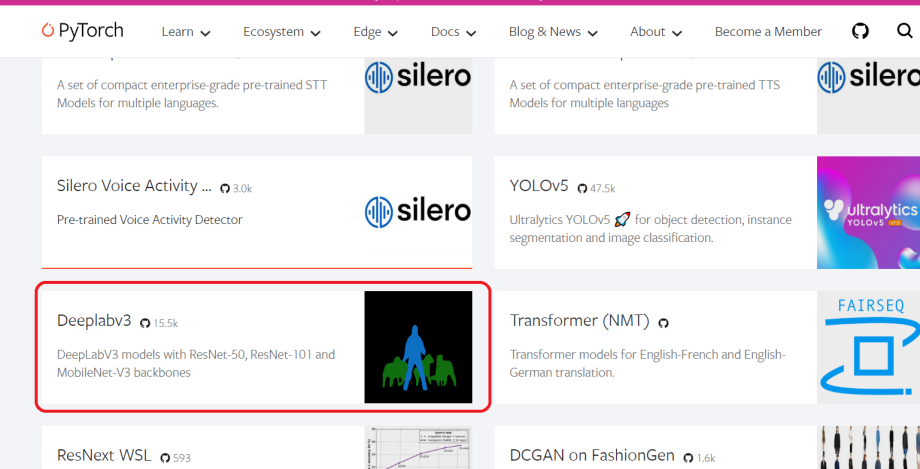
然后,我们随便点开一个模型,会出现如下界面。
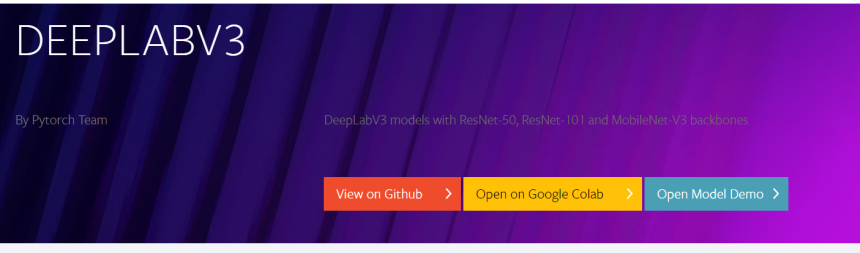
其中,第一个按钮是对应的 GITHUB 代码,第二个是使用谷歌配置好的实验环境,第三个进行模型演示。
3.hub 模块的代码演示
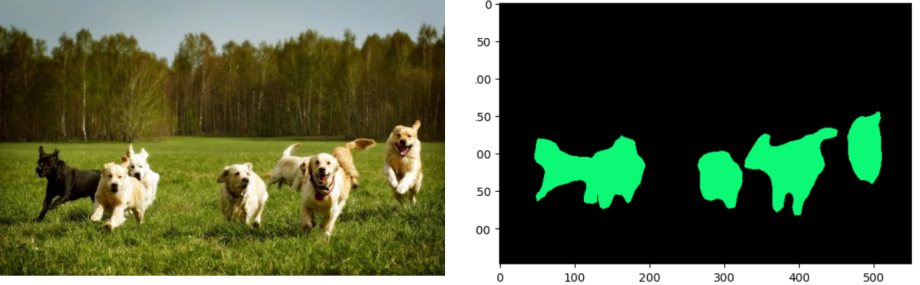
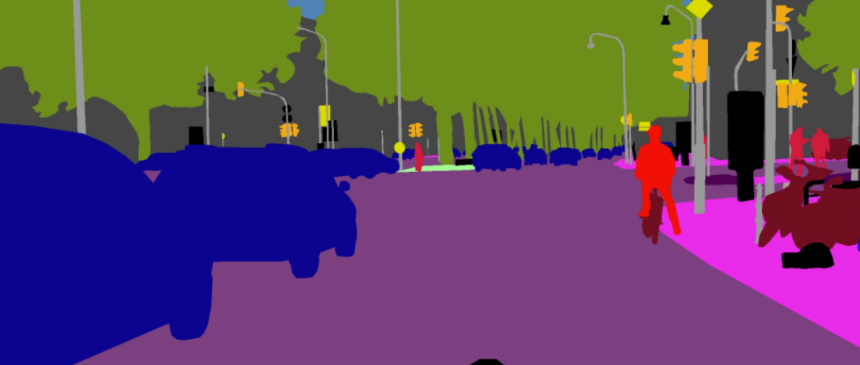
这里我们使用DeepLabv3模型, Deeplabv3是一款很经典语义分割模型,DeepLabv3模型能够很好的处理的图像级别的分类问题。DeepLabV3的提出是为了解决多尺度下的目标分割问题。如下图所示,不同目标在图中的尺寸大小不同,这也导致模型考虑不同尺寸的分割精度。
首先导入模型。
import torch
model = torch.hub.load('pytorch/vision:v0.10.0', 'deeplabv3_resnet50', pretrained=True)
# or any of these variants
# model = torch.hub.load('pytorch/vision:v0.10.0', 'deeplabv3_resnet101', pretrained=True)
# model = torch.hub.load('pytorch/vision:v0.10.0', 'deeplabv3_mobilenet_v3_large', pretrained=True)
model.eval()
我们可以使用 hub.list() 查看对应 pytorch 版本的模型信息。
torch.hub.list('pytorch/vision:v0.10.0')
['alexnet',
 'deeplabv3_mobilenet_v3_large',
 'deeplabv3_resnet101',
 'deeplabv3_resnet50',
 'densenet121',
 'densenet161',
 'densenet169',
 'densenet201',
 'fcn_resnet101',
 'fcn_resnet50',
 'googlenet',
 'inception_v3',
 'lraspp_mobilenet_v3_large',
 'mnasnet0_5',
 'mnasnet0_75',
 'mnasnet1_0',
 'mnasnet1_3',
 'mobilenet_v2',
 'mobilenet_v3_large',
 'mobilenet_v3_small',
 'resnet101',
 'resnet152',
 'resnet18',
 'resnet34',
 'resnet50',
 'resnext101_32x8d',
 'resnext50_32x4d',
 'shufflenet_v2_x0_5',
 'shufflenet_v2_x1_0',
 'squeezenet1_0',
 'squeezenet1_1',
 'vgg11',
 'vgg11_bn',
 'vgg13',
 'vgg13_bn',
 'vgg16',
 'vgg16_bn',
 'vgg19',
 'vgg19_bn',
 'wide_resnet101_2',
 'wide_resnet50_2']
我们可以从 pytorch 的网站上下载一个实例。
# Download an example image from the pytorch website
import urllib
url, filename = ("https://www.ancewang.com/uploads/ueditor/image/20200214/1581674086896543.jpg", "dog.png")
try: urllib.URLopener().retrieve(url, filename)
except: urllib.request.urlretrieve(url, filename)
我们执行样本,这里需要注意的是 torchvision。们需要将输入和模型移动到GPU以获得速度(如果可用)。
# sample execution (requires torchvision)
from PIL import Image
from torchvision import transforms
input_image = Image.open(filename)
input_image = input_image.convert("RGB")
preprocess = transforms.Compose([
    transforms.ToTensor(),
    transforms.Normalize(mean=[0.485, 0.456, 0.406], std=[0.229, 0.224, 0.225]),
])

input_tensor = preprocess(input_image)
input_batch = input_tensor.unsqueeze(0) # create a mini-batch as expected by the model

# move the input and model to GPU for speed if available
if torch.cuda.is_available():
    input_batch = input_batch.to('cuda')
    model.to('cuda')

with torch.no_grad():
    output = model(input_batch)['out'][0]
output_predictions = output.argmax(0)
我们可以创建一个调色板,为每个类选择一种颜色。
# create a color pallette, selecting a color for each class
palette = torch.tensor([2 ** 25 - 1, 2 ** 15 - 1, 2 ** 21 - 1])
colors = torch.as_tensor([i for i in range(21)])[:, None] * palette
colors = (colors % 255).numpy().astype("uint8")

# plot the semantic segmentation predictions of 21 classes in each color
r = Image.fromarray(output_predictions.byte().cpu().numpy()).resize(input_image.size)
r.putpalette(colors)

import matplotlib.pyplot as plt
plt.imshow(r)
# plt.show()