Elasticsearch单机安装步骤
Elasticsearch单机安装步骤
Elasticsearch单机安装步骤。
在CentOS7上安装单机版Elasticsearch,我们选择安装的版本是elasticsearch-7.13.4-linux-x86_64.tar.gz。
安装步骤
1).将ES的安装包上传到master的/root/tools/目录下
2).因为elasticsearch目前不支持root用户启动。创建一个es用户。
[root@master tools]# useradd -d /home/es -m es
[root@master tools]# passwd es
Changing password for user es.
New password: helloworld123456
Retype new password: helloworld123456
passwd: all authentication tokens updated successfully.
3).修改Linux中最大文件描述符以及最大虚拟内存的参数。
[root@master tools]# vim /etc/security/limits.conf
* soft nofile 65536
* hard nofile 131072
* soft nproc 2048
* hard nproc 4096
[root@master tools]# vim /etc/sysctl.conf
vm.max_map_count=262144
4).重启Linux系统。 前面修改的参数需要重启系统才会生效。
[root@master tools]# reboot -h now
5).解压ES安装包。
cd /root/tools
[root@master tools]# tar -zxvf elasticsearch-7.13.4-linux-x86_64.tar.gz -C /usr/local
[root@master tools]# cd /usr/local
[root@master local]# mv elasticsearch-7.13.4 elasticsearch
6).配置ES_JAVA_HOME环境变量,指向ES中内置的JDK,并且配置ES_HOME环境变量。
[root@master local]# vim /etc/profile
...
export ES_JAVA_HOME=/usr/local/elasticsearch/jdk
export ES_HOME=/usr/local/elasticsearch
...
[root@master local]# source /etc/profile
7).修改elasticsearch目录的权限,并且赋予es用户的访问权限。
[root@master local]# chmod 777 -R /usr/local/elasticsearch
[root@master local]# sudo chown -R es:es /usr/local/elasticsearch
8).修改elasticsearch.yml配置文件内容,主要修改network.host、discovery.seed_hosts这两个参数。
[root@master local]# cd /usr/local/elasticsearch
[root@master elasticsearch]# vim config/elasticsearch.yml
...
network.host: master
discovery.seed_hosts: ["master"]
...
注意:master前面必须要有一个空格,否则会报错。
9).启动ES服务(后台启动),在实际工作中需要将ES放在后台运行。
su es
cd $ES_HOME
bin/elasticsearch -d
10).jps命令验证ES服务是否启动
[root@master elasticsearch]$ jps
1849 Elasticsearch
11).通过web界面验证服务是否可以正常访问,端口为9200。 http://master:9200/
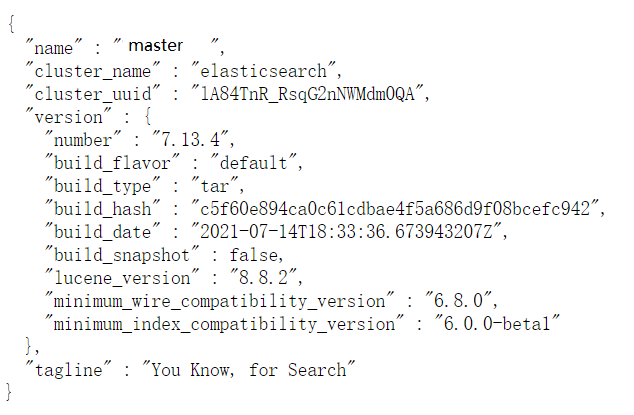
注意:需要关闭linux防火墙。
12).停止ES服务。使用kill命令停止。