向集群中提交Flink任务
向集群中提交Flink任务
向集群中提交Flink任务。
1.向集群中提交Flink任务
我们把第二章编写的任务提交到flink集群。
1).在pom.xml中添加打包配置。
<build>
    <finalName>flinkdemo</finalName>
    <plugins>
      <!-- 编译插件 -->
      <plugin>
        <groupId>org.apache.maven.plugins</groupId>
        <artifactId>maven-compiler-plugin</artifactId>
        <version>3.8.1</version>
        <configuration>
          <source>1.8</source>
          <target>1.8</target>
          <encoding>UTF-8</encoding>
        </configuration>
      </plugin>
      <!-- scala编译插件 -->
      <plugin>
        <groupId>net.alchim31.maven</groupId>
        <artifactId>scala-maven-plugin</artifactId>
        <version>3.1.6</version>
        <configuration>
          <scalaCompatVersion>2.12</scalaCompatVersion>
          <scalaVersion>2.12.11</scalaVersion>
          <encoding>UTF-8</encoding>
        </configuration>
        <executions>
          <execution>
            <id>compile-scala</id>
            <phase>compile</phase>
            <goals>
              <goal>add-source</goal>
              <goal>compile</goal>
            </goals>
          </execution>
          <execution>
            <id>test-compile-scala</id>
            <phase>test-compile</phase>
            <goals>
              <goal>add-source</goal>
              <goal>testCompile</goal>
            </goals>
          </execution>
        </executions>
      </plugin>
      <!-- 打jar包插件(会包含所有依赖) -->
      <plugin>
        <artifactId>maven-assembly-plugin</artifactId>
        <configuration>
          <descriptorRefs>
            <descriptorRef>jar-with-dependencies</descriptorRef>
          </descriptorRefs>
          <archive>
            <manifest>
              <mainClass></mainClass>
            </manifest>
          </archive>
        </configuration>
        <executions>
          <execution>
            <id>make-assembly</id>
            <phase>package</phase>
            <goals>
              <goal>single</goal>
            </goals>
          </execution>
        </executions>
      </plugin>
    </plugins>
  </build>
2).打成jar包。
mvn clean package -DskipTests
3).把flinkdemo.jar上传到 /root/examples/
4).提交Flink任务,注意:提交任务之前,先开启socket
[root@master ~]# nc -l 9001
5).提交任务。
[root@master sbin]# cd $FLINK_HOME
[root@master flink]# bin/flink run -m yarn-cluster -c com.simoniu.flink.scala.SocketWindowWordCountScala  -yjm 1024 -ytm 1024 /root/examples/flinkdemo.jar
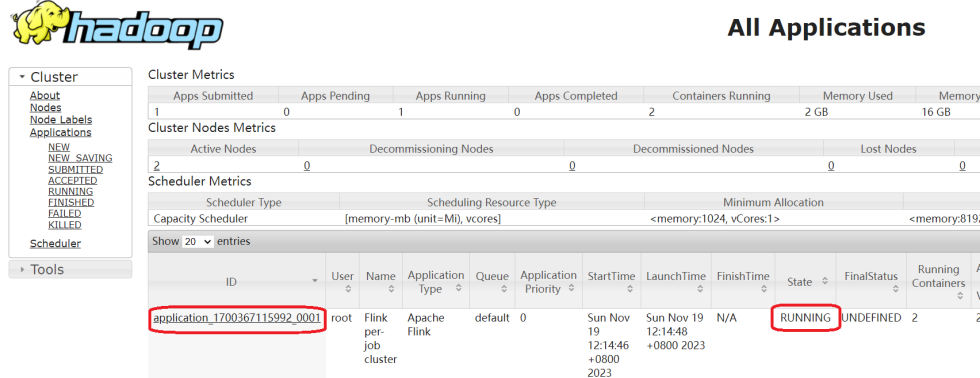
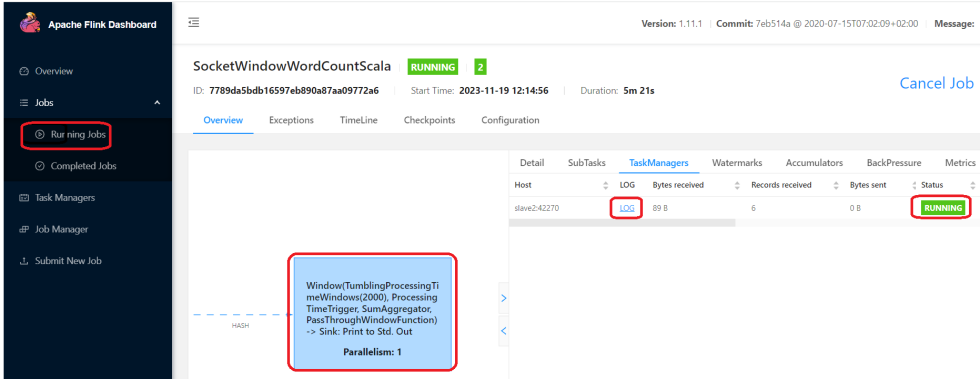
此时到yarn上面可以看到确实新增了一个任务,点击进去可以看到flink的web界面。
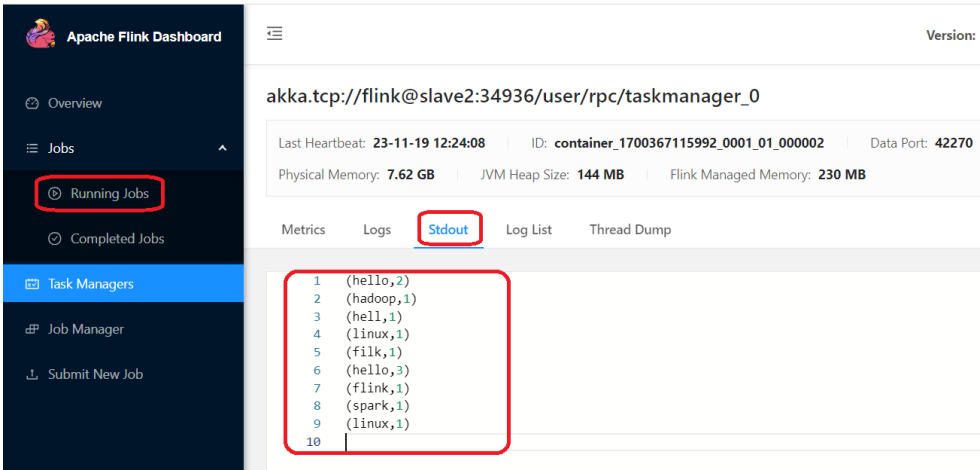
通过socket输入一串测试数据。
[root@master ~]# nc -l 9001
hello filk hello linux hell hadoop
hello linux hello spark hello flink
然后到flink的web界面查看日志。
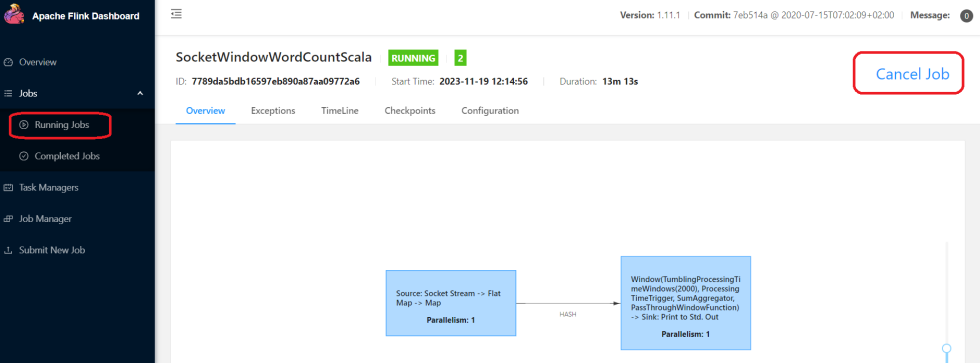
接下来我们如何把这个任务停掉,因为这个任务是一个流处理的任务,提交成功之后,它会一直运行。
此时如果想要停止Flink任务,有两种方式:
1:停止yarn中任务
[root@master flink]# yarn application -kill application_1700367115992_0001
2:停止flink任务 可以在界面上点击这个按钮,或者在命令行中执行flink cancel停止都可以。
或者:
#第一个参数是yarn的applicationId,第二个参数是flink的jobId

[root@master flink]# bin/flink cancel -yid application_1700367115992_0001 7789da5bdb16597eb890a87aa09772a6
注意:此时flink任务停止之后就无法再查看flink的web界面了,如果想看查看历史任务的执行信息就看不了了,怎么办呢?和spark类似,flink也有historyserver进程,通过启动flink的historyserver也可以解决这个问题的。
flink的historyserver进程可以在任意一台机器上启动,在这我们选择在master机器上启动 在启动historyserver进程之前,需要先修改master中的flink-conf.yaml配置文件。
#==============================================================================
# HistoryServer
#==============================================================================

# The HistoryServer is started and stopped via bin/historyserver.sh (start|stop)

# Directory to upload completed jobs to. Add this directory to the list of
# monitored directories of the HistoryServer as well (see below).
jobmanager.archive.fs.dir: hdfs://master:9000/flink/completed-jobs/

# The address under which the web-based HistoryServer listens.
historyserver.web.address: 192.168.128.128

# The port under which the web-based HistoryServer listens.
historyserver.web.port: 8082

# Comma separated list of directories to monitor for completed jobs.
historyserver.archive.fs.dir: hdfs://master:9000/flink/completed-jobs/

# Interval in milliseconds for refreshing the monitored directories.
historyserver.archive.fs.refresh-interval: 10000
然后启动flink的historyserver进程。
[root@master flink]# cd $FLINK_HOME
[root@master flink]# bin/historyserver.sh start
注意:hadoop集群中的historyserver进程也需要启动。
验证进程:
[root@master hadoop3.1]# jps
83520 HistoryServer
14889 SecondaryNameNode
15466 ResourceManager
22106 CliFrontend
98891 Jps
86442 JobHistoryServer
14286 NameNode
此时Flink任务停止之后也是可以访问flink的web界面的。